A vehicle’s lighting system does far more than help you see the road ahead — it’s an essential safety feature that ensures you’re visible to others in all conditions. From headlights and taillights to indicators and interior illumination, every light serves a purpose. Yet, many drivers overlook early warning signs that their car’s lighting system needs attention until visibility — and safety — are compromised.
This article provides a comprehensive diagnostic checklist to help identify when your lighting system requires maintenance or replacement.
Why Lighting Maintenance Matters
Properly functioning lights are not just about aesthetics or comfort — they are a legal and safety requirement. Faulty headlights or brake lights can cause accidents or result in fines. According to studies, nearly one in four vehicles on the road has at least one light malfunction, often due to neglected maintenance or gradual wear.
A proactive inspection of your car’s lighting system ensures:
-
Optimal nighttime visibility.
-
Improved reaction time for drivers behind you.
-
Compliance with road safety regulations.
-
Reduced risk of electrical failures spreading to other systems.
Common Signs of Lighting System Issues
| Symptom | Possible Cause | Recommended Action |
|---|---|---|
| Dim headlights | Aging bulbs, corroded connectors, or voltage drop | Check voltage and replace bulbs or wiring |
| Flickering lights | Loose connections or alternator issues | Inspect terminals and test charging system |
| Uneven beam pattern | Misaligned headlights or reflector damage | Recalibrate or replace housing |
| Burnt-out bulbs | Normal wear or blown fuse | Replace bulb and check fuses |
| Foggy or yellowed lenses | Oxidation or moisture intrusion | Clean, polish, or replace lens cover |
| Dashboard light warning | Fault in lighting circuit | Run diagnostic scan or visual inspection |
If you notice any of these problems, your lighting system is signaling that it needs attention — before it becomes a hazard.
Step-by-Step Diagnostic Checklist
Follow this structured checklist to evaluate your vehicle’s lighting system effectively:
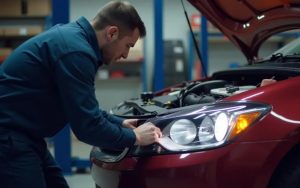
1. Exterior Lights Inspection
Perform a walk-around check with the engine running and lights switched on.
Check the following:
-
Headlights (low and high beam): Verify equal brightness and alignment.
-
Fog lights: Ensure they function correctly and are aimed low to prevent glare.
-
Taillights and brake lights: Confirm both sides illuminate evenly and respond instantly when pressing the brake pedal.
-
Turn signals and hazard lights: Inspect all four corners and the dashboard indicator.
-
Reverse lights: Engage reverse gear to confirm they activate properly.
Tip: Ask someone to help while you operate the controls, or use reflective surfaces (like a wall) to check rear illumination.
2. Interior and Dashboard Lighting
Interior lighting may not affect visibility on the road but plays an important role in comfort and safety.
Inspect:
-
Instrument cluster and dashboard backlighting.
-
Gear selector illumination.
-
Dome, glove box, and door lights.
-
Illumination around controls (window switches, climate controls, etc.).
Common Issues:
-
Dim or flickering dash lights may indicate voltage fluctuations or failing LED drivers.
-
Sudden loss of all interior lights could suggest a blown fuse or faulty switch.
3. Headlight Alignment and Beam Pattern
Improperly aligned headlights reduce visibility and may blind oncoming drivers.
Signs of Misalignment:
-
One light appears higher or brighter than the other.
-
You notice a dark or uneven patch on the road.
-
Other drivers frequently flash their high beams at you.
You can perform a quick alignment test by parking about 3 meters from a wall and checking if both beams hit at equal height. Adjust them using the headlight aim screws or have a professional perform a calibrated alignment.
| Symptom | Effect on Visibility | Solution |
|---|---|---|
| High beam aimed too low | Short visibility range | Raise beam height |
| Low beam aimed too high | Glare to others | Lower beam height |
| Uneven pattern | Patchy road illumination | Adjust reflector or replace housing |
4. Electrical and Connection Check
Lighting problems often stem from wiring and electrical faults rather than bulbs themselves.
Inspect for:
-
Corrosion: Look for rust or greenish deposits on connectors.
-
Loose plugs: Ensure all sockets are firmly seated.
-
Melted or discolored connectors: Indicates overheating or excessive current.
-
Fuse condition: Replace blown fuses with ones of the correct rating.
-
Relay testing: Listen for relay clicks when lights are turned on; silence may suggest failure.
Tip: Use a multimeter to measure voltage drop — healthy circuits should show minimal resistance.
5. Lens and Housing Condition
Even if your bulbs are working, cloudy or cracked lenses can severely reduce light output.
Look for:
-
Yellowing or hazing: Caused by UV exposure — polish using a headlight restoration kit.
-
Cracks or leaks: Moisture inside the housing can short-circuit components.
-
Condensation: Indicates a failed seal; dry it out and reseal to prevent corrosion.
| Lens Condition | Impact on Lighting | Fix |
|---|---|---|
| Cloudy surface | 20–40% light reduction | Polish and reseal |
| Cracked housing | Water ingress risk | Replace unit |
| Internal moisture | Reduced beam clarity | Dry and reseal |
When to Replace Lighting Components
You should consider replacement when:
-
Bulbs exceed their rated lifespan (typically 400–1000 hours for halogen, >10,000 for LED).
-
Brightness fades noticeably even if bulbs still function.
-
Upgrading to modern LED or projector systems for improved clarity.
-
Electrical faults persist after cleaning and testing.
Always replace bulbs in pairs to maintain uniform brightness and color temperature.
If your car’s lighting system needs new components, you can Buy Car Lighting online to ensure compatibility, performance, and safety.
Preventive Maintenance Tips
-
Clean regularly: Remove dust and grime buildup to maintain full light output.
-
Avoid touching bulb glass: Oils from skin can create hot spots, shortening lifespan.
-
Inspect after winter or rainy seasons: Moisture can damage connectors and seals.
-
Use dielectric grease: Protects terminals from corrosion and improves conductivity.
-
Check after collisions: Even minor impacts can misalign or crack light assemblies.
The Role of Modern Diagnostics
Many modern vehicles feature smart lighting systems equipped with sensors and adaptive controls. Dashboard warnings, CAN-bus monitoring, and fault codes make it easier to identify issues early.
Examples of diagnostic alerts:
-
“Check left dipped beam” – indicates bulb or wiring failure.
-
“Adaptive headlight malfunction” – sensor or actuator issue.
-
“Brake light failure” – blown bulb or fuse.
Using a basic OBD-II scanner, you can detect and clear lighting-related error codes, ensuring all systems work as intended.
Conclusion
Your car’s lighting system is a vital part of vehicle safety, communication, and comfort. Neglecting signs of malfunction — even minor dimming or flickering — can lead to reduced visibility, increased risk of accidents, or expensive electrical damage down the line.
A simple diagnostic checklist and routine maintenance go a long way in keeping your lighting system performing at its best.
When replacements or upgrades are needed, make sure to Buy Car Lighting online to get reliable, high-quality components that ensure optimal visibility and road safety — day or night.